Introduction
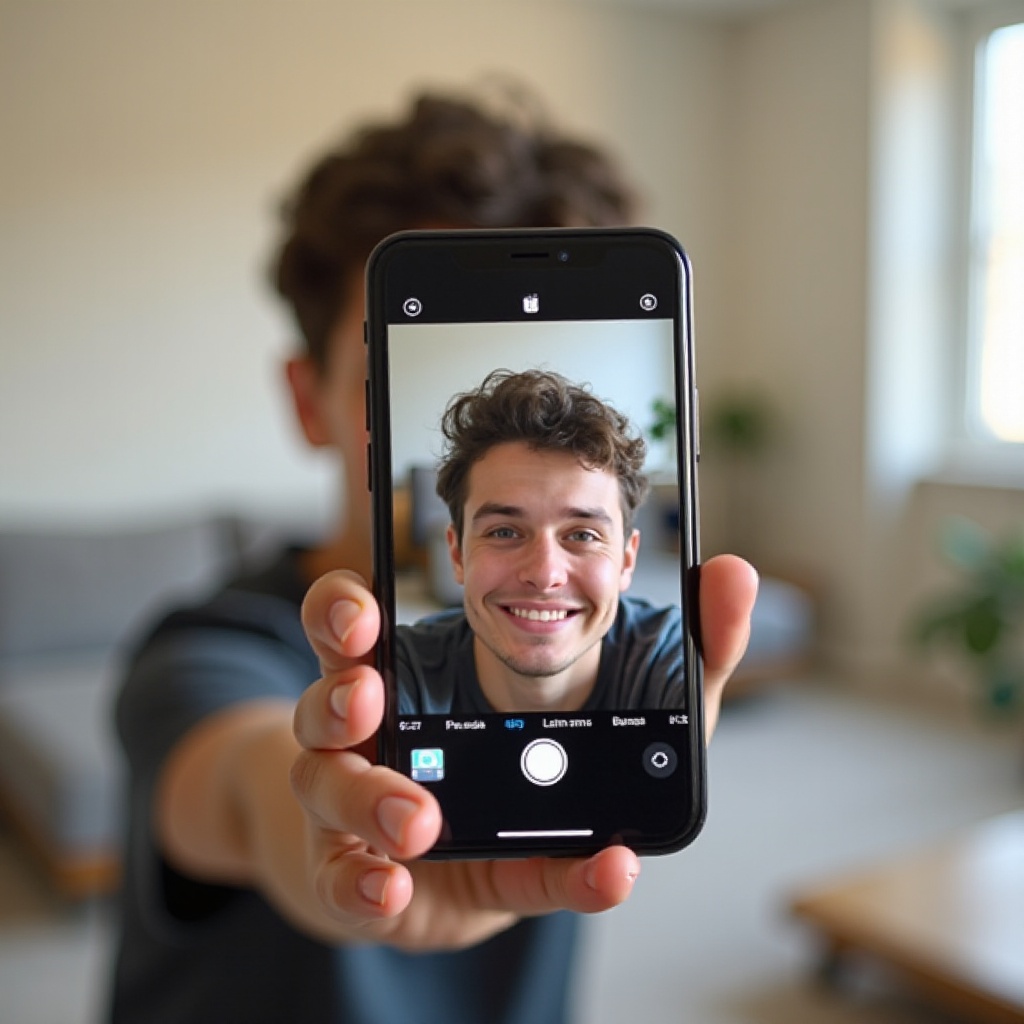
You open your iPhone’s front camera, take a selfie, and it looks fine. But when you check the saved photo, everything appears flipped. Text on your shirt is backwards. Your hair part is on the wrong side. It feels like the camera has a mind of its own and keeps changing your face.
This ‘inverted’ or mirrored effect is one of the most common iPhone camera complaints, especially from people who shoot a lot of selfies, short videos, or social content. The good news: you can control most of this behavior with a few simple settings and habits. You do not need any special apps or advanced skills.
In this guide, you will learn exactly how to turn off inverted camera on iPhone, how to fix flipped photos and videos you have already shot, and what to do inside popular apps like FaceTime, Instagram, and TikTok. You will also see recommended settings that help you avoid mirrored results in the future so you do not keep wondering why your camera is behaving strangely.
To get there, start with the basics and understand what ‘inverted’ really means on iPhone. Once that is clear, you can follow the step-by-step instructions to change your settings in under a minute and then fine-tune your setup for photos, videos, and calls.
What Does an ‘Inverted’ Camera Mean on iPhone?
When people say their iPhone camera is ‘inverted’, they usually mean one of two things:
- The selfie preview looks like a mirror, but the saved photo is flipped.
- The final photo or video shows text, logos, or their face reversed from what they expected.
By design, the front camera on your iPhone shows a mirrored preview. Apple does this because it feels natural, like looking in a mirror. When you raise your right hand, the image on screen raises the ‘right’ hand too. This helps you adjust your hair, makeup, or pose without overthinking.
However, when the iPhone saves the photo, it often un-mirrors the image so that the world looks correct. Text becomes readable, and the camera treats the photo more like a picture of you taken by someone else. For many people, this is technically accurate but visually confusing, because it does not match the mirror image they see every day.
There is another issue that people sometimes call inversion. Some users rotate the phone or switch cameras while recording and end up with sideways or upside-down footage. That is a rotation problem, not a mirror problem, but it still feels like the camera inverted the image.
To control these behaviors, you need to understand how iOS handles mirroring and orientation by default. Once you know that, you can decide which settings will give you the most natural result for selfies, documents, and videos.
Next, you will quickly confirm that your iPhone and iOS version support the key setting that lets you control mirrored selfies and avoid many of these surprises.
Why Your iPhone Selfies Look Flipped or Backwards
If your selfies look flipped or backwards, you are usually seeing the difference between two things:
- The live preview in the Camera app (mirrored).
- The final saved photo in the Photos app (sometimes un-mirrored).
Your brain is used to your mirror image. You see that version of your face every day in the bathroom mirror. When your iPhone saves a non-mirrored photo, you see yourself as others see you. This view can feel ‘wrong’ or unfamiliar, even though the image is actually accurate.
Text and logos in the shot make this even more obvious. If you wear a t-shirt with words or take a selfie in front of a sign, mirrored previews show that text backwards. When the iPhone changes it on save, you may feel like the camera inverted the picture or that the phone is doing something inconsistent.
Video and video calls add another layer. Some apps mirror the preview so you can adjust your position, but they send or save a non-mirrored feed to your viewers. Others keep the mirrored version both in preview and in the final recording, depending on their design.
Understanding these differences helps you pick the right settings and trust the final image. Before you change anything, it is smart to make sure your iPhone and iOS version actually support the mirror control you need. That is your next step.
Check Your iOS Version and iPhone Model First
Before you change camera behavior, confirm that your device supports the ‘Mirror Front Camera’ setting and is running a recent version of iOS. This option appears on modern iPhones with current software and gives you direct control over how selfies are saved.
To check your version and model:
- Open Settings.
- Tap General.
- Tap About.
- Look at Software Version and Model Name.
If you run a recent version of iOS on a modern iPhone, you will find the setting you need in the Camera menu. If your software is out of date, update it:
- Go to Settings > General > Software Update.
- Download and install any available update.
Once you are sure your iPhone is up to date, you can change the main toggle that controls whether the front camera saves mirrored or non-mirrored photos. That is the key to turning off the inverted camera effect that annoys so many users.
How to Turn Off Inverted (Mirrored) Camera in iPhone Settings
The main way to turn off inverted selfies is by changing one simple toggle in the Camera settings. This directly affects how the iPhone saves images from the front camera, and it is the setting most people are looking for when they search how to turn off inverted camera on iPhone.
Follow these steps carefully so you know exactly what is changing and how to test it.
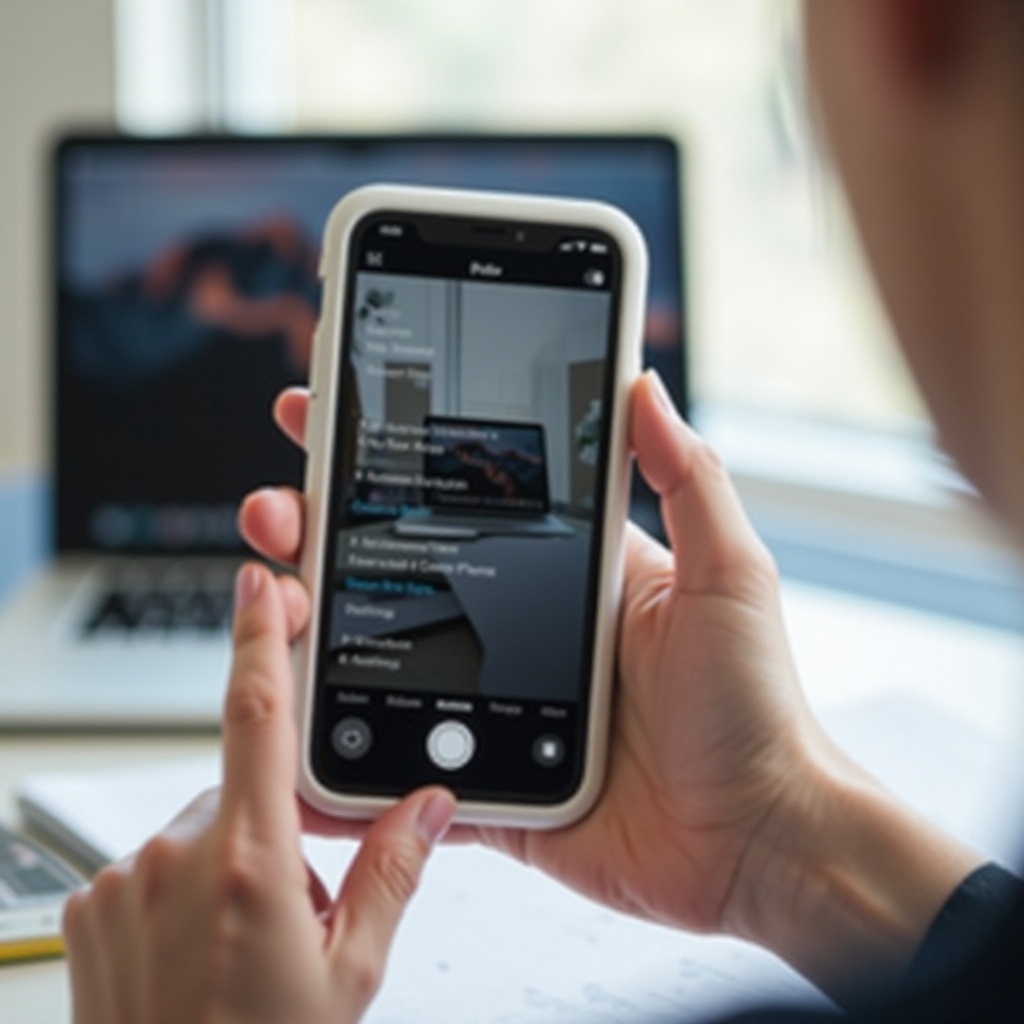
Step 1: Open the Settings App on Your iPhone
Unlock your iPhone and find the Settings app on your Home Screen or in your App Library. Tap it to open. You will manage all camera behavior from here, not from inside the Camera app itself.
Make sure you stay in Settings for the next few steps, because the options you need are all in one place and easy to miss if you move too fast.
Step 2: Navigate to the Camera Settings Menu
Inside Settings:
- Scroll down until you see Camera.
- Tap Camera to open the camera options.
This menu controls photo formats, grid lines, composition options, and the mirroring behavior for the front camera. Take a moment to notice the other settings too, as you may want to adjust them later for composition and quality.
Step 3: Turn Off the ‘Mirror Front Camera’ Option
In the Camera settings:
- Look for a toggle labeled Mirror Front Camera.
- If the switch is green, mirroring is enabled. That means your iPhone saves selfies exactly as you see them in the preview.
- Tap the toggle to turn it off.
With ‘Mirror Front Camera’ off, your iPhone will now:
- Show a mirrored preview when you use the front camera, so framing still feels like a mirror.
- Save the final photo un-mirrored, so text is readable and the image matches how you appear to other people.
If you prefer your selfies to match the preview exactly, you can leave this setting on. But if you want to stop the feeling that your camera inverted your face or text, turning this off gives you a consistent, natural result that matches the real world.
Step 4: Test the Change with a New Selfie
Now test the setting so you can see the difference in practice:
- Open the Camera app.
- Switch to the front camera.
- Take a selfie, ideally with some text in the background or on your clothing.
- Open the Photos app and view the picture.
Compare the live preview you remember with the saved photo. When ‘Mirror Front Camera’ is off, the photo should show readable text, and your face should match how you appear to others, not your mirror image.
Once the front camera behaves the way you want, you are ready to look at videos. Videos have their own habits and can still cause confusion if you are not careful with orientation.
How to Turn Off Inverted Camera for Videos on iPhone
Photos and videos use similar rules, but there are still differences that matter. You may find that video from the front camera looks flipped in some cases, especially if you rotate the phone or switch cameras while you are recording.
Understanding how front and rear cameras behave in video mode will help you avoid most orientation and inversion problems before they happen.
Front vs. Rear Camera Behavior in Video Mode
On iPhone:
- The rear camera generally records exactly how the scene appears. It does not mirror the image.
- The front camera shows a mirrored preview for your comfort, but the saved video often appears non-mirrored, similar to photos.
This can make your video thumbnails look different from what you saw on screen while recording. Knowing this, you can adjust your habits and framing to match the final result instead of relying only on the preview.
Avoiding Flipped Footage When You Start Recording
To reduce orientation problems in your videos:
- Decide whether you want portrait (vertical) or landscape (horizontal) orientation before you start recording.
- Hold the phone in that position and wait a moment for the interface to rotate and settle.
- Then tap Record.
If you rotate the phone after recording starts, some apps may save sideways or upside-down clips. That feels like the camera inverted the video, even though it simply followed the phone’s rotation. A short pause before recording can prevent this.
Preview and Re-Record if Orientation Looks Wrong
After recording a clip:
- Open the Photos app.
- Play the video.
- If it appears mirrored or rotated in a way you do not like, you can:
- Use the Edit button to rotate it to the correct orientation.
- Re-record with better framing and a stable orientation if the clip is not easy to fix.
Once you understand how video behaves in the built-in Camera app, the next step is to look at third-party apps. Many users see the most inversion issues in social or calling apps, not the default camera.
Fixing Inverted Camera in Popular iPhone Apps
Even if you change your system camera settings, some apps handle mirroring their own way. They may ignore the iOS toggle or use only a mirrored preview for your comfort, while sending a non-mirrored image to other people.
Knowing how FaceTime and social apps behave will help you avoid surprises when you are on a call or posting content.
FaceTime: What You See vs. What Others See
In FaceTime, the small window that shows your own face is usually mirrored. This helps you adjust your position, just like looking into a mirror. However, the person you call sees a non-mirrored image.
That means:
- Your preview may look flipped or backwards to you.
- Their view of you is normal and not inverted.
FaceTime does not offer a simple toggle to change this mirroring behavior. Instead, you can trust that others see you correctly, even if your own preview feels reversed or strange.
Social Media Apps: Instagram, TikTok, Snapchat
Apps like Instagram, TikTok, and Snapchat often:
- Show a mirrored preview when you use the front camera so framing feels familiar.
- Decide on their own whether to save the result mirrored or un-mirrored.
To control this as much as possible:
- Open the app’s Settings or Camera options.
- Look for words like Mirror, Flip, Front camera, or Selfie.
- Test a short clip or photo and see how it saves to your camera roll.
If the app does not give you a clear option, you can:
- Save the content to your camera roll first.
- Flip it in the Photos app or a video editor before posting it.
Messaging Apps: WhatsApp, Messenger, Telegram
Messaging apps such as WhatsApp, Messenger, and Telegram behave much like video call apps:
- Your own preview may be mirrored so you can adjust your framing.
- The person you send the video or call to usually sees a non-mirrored view.
If you record video messages inside these apps, test a sample and send it to yourself or a trusted contact. That way, you will know how the app saves or sends the final clip and whether you need to edit it afterward.
If you already have inverted photos or videos saved, there is no need to retake them. The next step shows you how to fix those files directly on your iPhone.
How to Fix Already Inverted Photos and Videos on iPhone
If you have a library full of selfies or clips that look backwards, you can flip them easily using built-in tools and, if needed, third-party apps. This is faster than recreating important shots and gives you control over your older content.
Flip a Photo Using the Photos App Editor
To fix a mirrored photo:
- Open the Photos app.
- Tap the image you want to fix.
- Tap Edit in the top right corner.
- Tap the crop/rotate icon (it looks like a square with arrows).
- Look for a flip icon (often two triangles or a mirror symbol).
- Tap that flip icon to mirror the photo horizontally.
- Tap Done to save your changes.
This changes the image so text becomes readable and the orientation looks natural. If you are not happy with the result, you can always return to Edit and revert to the original.
Flip a Video Using iMovie or Similar Apps
For videos, the Photos editor is more limited. Use iMovie or another video editor:
- Install iMovie from the App Store if you do not already have it.
- Open iMovie and tap Create Project.
- Choose Movie, then select your mirrored clip.
- In the editing view, use two fingers to rotate and flip the video, or use a built-in flip or mirror option if available.
- Export and save the corrected version back to Photos.
Many third-party editors also offer a simple ‘mirror’ or ‘flip’ button that applies to the entire clip. Pick the tool that feels easiest for you and stick with it so your workflow stays simple.
Tips to Preserve Quality When Editing Flipped Media
To keep quality high when you fix inverted photos and videos:
- Avoid repeatedly exporting and re-editing the same file.
- Work from the original version where possible.
- Export in the same resolution and frame rate as the source clip.
Once your old media looks right, you can focus on preventing new content from being inverted. The next section shows you how to choose camera settings that match your habits and reduce confusion for future shots.
Recommended Camera Settings to Avoid Inverted Results
To stop worrying about inversion every time you take a picture or shoot a video, set up your camera once with clear rules for your typical use. A few smart defaults can save you time and frustration.
Best Default Settings for Everyday Selfies
For most people who take casual selfies and share them with friends:
- Turn Mirror Front Camera off in Settings > Camera.
- Use the front camera for quick selfies and video messages.
- Check your saved photos after any change in settings so you know what to expect.
This setup gives you a mirror-like preview but saves photos in a way that matches how others see you and keeps text readable. It is a good balance between comfort and accuracy.
Ideal Settings for Text, Logos, and Documents
If you often capture:
- Notes on a whiteboard.
- Printed documents.
- Clothing with logos or text.
Then consider these habits:
- Use the rear camera whenever possible for sharper results and correct orientation.
- Keep Mirror Front Camera off so the phone does not save mirrored text.
- Use good lighting and hold the phone steady or use a stand to reduce blur.
These habits help you avoid any mirrored or unreadable text in important shots, such as work notes, signs, or reference images you need to share.
Extra Tips for Creators and Influencers
If you create content regularly for social media or clients:
- Test your setup in each app you use, such as Instagram, TikTok, and YouTube.
- Decide whether you want a mirrored ‘personal’ style or a true-to-life orientation.
- Use a tripod or stand so you can frame yourself once and then focus on your message.
- Save original clips to your camera roll, then edit and flip them only once before posting.
A few quick tests can save you from reshooting content because it looked inverted after posting. Once you have your ideal setup, you can keep your process consistent and efficient.
Even with the best setup, issues can still pop up. The next section walks through simple troubleshooting steps if your camera still looks inverted after you change settings.

Troubleshooting: When Your Camera Still Looks Inverted
If you have changed settings and your camera still behaves strangely, a few troubleshooting steps can help you track down the cause. Often, the fix is simple and does not require new apps or a repair.
Restart, Update iOS, and Recheck Camera Settings
Start with the basics:
- Restart your iPhone to clear temporary glitches in the Camera or Photos apps.
- Check for updates in Settings > General > Software Update and install any available update.
- Open Settings > Camera and confirm that Mirror Front Camera is set the way you want.
Sometimes a simple restart or update fixes stubborn behavior in the Camera app or system. After each change, test your camera again with a quick selfie or short video.
Reset All Settings Without Deleting Your Data
If problems continue and your selfies still look inverted or apps act inconsistent:
- Go to Settings > General > Transfer or Reset iPhone.
- Tap Reset.
- Choose Reset All Settings.
This resets system settings, including camera and privacy settings, but keeps your photos, videos, and apps. You will need to re-enter Wi-Fi passwords and adjust some options again, but it can clear hidden configuration issues.
When to Contact Apple Support or Visit a Store
If you still see problems after all these steps, such as:
- The Camera app crashes often or refuses to open.
- The image appears distorted, not just mirrored or rotated.
- You see hardware-related issues like lines, flickering, or severe blur.
Then contact Apple Support or visit an Apple Store or authorized service provider. Hardware or deeper software problems may require professional help, and they can run diagnostics that you cannot access at home.
Conclusion
The feeling that your iPhone inverted your photos usually comes from how the front camera mirrors the preview and then saves a different version. Once you understand this, you can control it with a few clear settings and habits.
You have learned how to turn off inverted camera on iPhone by using the Mirror Front Camera setting, how to handle video orientation, and how to adjust behavior inside popular apps like FaceTime and social platforms. You also saw how to fix already mirrored photos and videos with simple editing tools and how to set up your camera for reliable results in your daily life.
With these steps, your selfies, clips, and calls can look exactly the way you expect. Spend a few minutes adjusting your settings now, and you will save yourself a lot of confusion, retakes, and editing later. Once your camera behaves the way you like, you can focus on capturing great moments instead of fighting with inverted images.
Frequently Asked Questions
Why do my iPhone selfies look different after I take the photo?
Your iPhone shows a mirrored preview in the Camera app so it feels like a mirror. When it saves the photo, it may remove that mirroring so text looks correct. This change makes your face look slightly different from the preview and from your mirror image.
Can I turn off the inverted camera only for certain apps?
The ‘Mirror Front Camera’ toggle in Settings > Camera controls the built-in Camera app. Many third-party apps use their own camera logic. To change behavior in those apps, open their settings and look for mirroring or flip options, or edit saved media afterward.
Does turning off ‘Mirror Front Camera’ affect video calls?
Turning off ‘Mirror Front Camera’ affects how the Camera app saves photos and some videos, but video call apps like FaceTime often handle mirroring on their own. In most calls, your preview may be mirrored, but other people see a normal, non-mirrored image.