Introduction
You grab your iPhone, open Settings, and try to change something important, but a new security prompt appears about Stolen Device Protection. You pause and ask yourself: how do I turn off Stolen Device Protection on iPhone, and is it a smart move?
Apple added Stolen Device Protection as an extra shield when a thief knows your passcode and gets hold of your phone. This feature can block or delay sensitive actions, such as changing your Apple ID password or turning off Find My, unless you pass additional checks.
This guide walks you through what Stolen Device Protection does, the real risks of turning it off, and the exact steps to disable it if you decide that is best for you. You will also see safer alternatives, plus how to turn the feature back on later. By the time you finish reading, you will know how to balance convenience and security on your iPhone without guessing.

What Is Stolen Device Protection on iPhone?
Before you switch off any important security feature, you need a clear picture of what it does and why Apple created it. Once you know its purpose, you can make an informed choice instead of weakening your device by accident.
Why Apple Introduced Stolen Device Protection in 2024
Apple introduced Stolen Device Protection to respond to a specific theft pattern. Thieves were watching people unlock their iPhones in public, memorizing the passcode, then stealing the phone and using that passcode to take over accounts.
Once thieves had both the device and the passcode, they could:
- Change the Apple ID password.
- Turn off Find My iPhone.
- Remove security measures and activation locks.
- Access apps holding banking, email, and password managers.
Victims often lost access to their Apple ID, their photos, and even money in their accounts in a matter of minutes. Stolen Device Protection adds extra barriers, so a stolen passcode alone is not enough to completely hijack your iPhone and your digital life.
Which iPhones and iOS Versions Support Stolen Device Protection
Stolen Device Protection is available on supported iPhones running recent iOS versions from 2024 onward, such as iOS 17 builds and later. The feature is designed for devices that support modern security tools like Face ID or the latest Touch ID implementations.
To check if your iPhone supports and uses Stolen Device Protection:
- Go to Settings.
- Tap Face ID & Passcode or Touch ID & Passcode, depending on your model.
- Enter your device passcode.
- Scroll down and look for a section labeled Stolen Device Protection or a similar security option.
If you do not see it, you may need to update iOS, or the feature may not be available in your region or on your specific device model.
What Stolen Device Protection Does and What It Does Not Do
Stolen Device Protection focuses on high‑risk account and device actions. When it is turned on, it can:
- Require Face ID or Touch ID for sensitive changes, even if the passcode is already known.
- Add a security delay (for example, about an hour) before you can perform certain tasks in unfamiliar locations.
- Make it harder for a thief who knows your passcode to lock you out of your Apple ID or disable Find My quickly.
At the same time, it does not:
- Replace your passcode, Face ID, or Touch ID.
- Stop every type of scam or theft.
- Make your iPhone physically unstealable.
Instead, it reduces the damage a thief can cause after they already have your phone and your passcode. With that foundation in place, you can now consider the real impact of turning this feature off.
Before You Turn Off Stolen Device Protection: Is It Safe?
Understanding what Stolen Device Protection does naturally leads to the next question: is it safe to turn it off on your iPhone? The answer is different for each person, but there are clear risks and a few valid reasons why some users still choose to disable it.
Security Risks of Disabling Stolen Device Protection
When you turn off Stolen Device Protection, you remove an important safeguard that slows down or blocks a thief who already has your passcode. With the feature disabled, someone holding your iPhone and your code can more easily:
- Change your Apple ID password.
- Turn off Find My iPhone and disable tracking.
- Remove Activation Lock on the device.
- Reset key security settings on your iPhone and Apple ID.
This creates several serious risks:
- You can lose the ability to locate or remotely wipe your device.
- Thieves can take over your Apple ID and access iCloud backups, photos, and files.
- Accounts tied to your phone, such as email, banking, and social media, become easier targets.
For many users, the protection this feature offers is worth a few extra prompts or delays. Turning it off should never be an automatic choice.
When Disabling the Feature Might Make Sense
Despite the risks, there are situations where turning off Stolen Device Protection can be reasonable, at least for a limited time. For example:
- You work mostly from home or another secure location and rarely use your phone in public.
- You face repeated issues with Face ID or Touch ID and struggle to pass extra checks.
- You are doing advanced troubleshooting, device repair, or testing where the feature slows your workflow.
Even in these scenarios, the safest approach is to keep the feature on by default and only disable it when you have a clear need and a plan to turn it back on afterward.
What You Lose When You Turn It Off
Disabling Stolen Device Protection removes:
- Extra biometric checks for high‑risk actions.
- Location‑based security delays that give you time to react if your device is stolen in an unfamiliar place.
- An important layer of defense against passcode‑based account takeover.
So when you think about how to turn off Stolen Device Protection on iPhone, also think about what will protect you if your phone is stolen and your passcode is known. The next step is to prepare your device and account before you make any security changes.
Requirements and Preparation Before Disabling Stolen Device Protection
If you decide to move forward and disable Stolen Device Protection, avoid rushing straight into the settings. A few quick checks before you turn it off will make it easier to recover if something goes wrong and will help keep your data safe.
Check Your iOS Version and Availability of the Feature
First, confirm that your iPhone software is up to date and that Stolen Device Protection is actually present on your device:
- Go to Settings > General > Software Update.
- Install any available updates.
- After updating, open Settings again.
- Tap Face ID & Passcode or Touch ID & Passcode.
- Enter your device passcode.
- Scroll down and look for Stolen Device Protection.
If you still do not see the feature after updating, it may not be available for your region, carrier, or iPhone model. In that case, there may be nothing to turn off.
Confirm Access to Your Apple ID and Trusted Devices
Because you will change an important security setting, make sure you fully control your Apple ID and can pass any extra checks Apple might require later:
- Sign in to appleid.apple.com in a web browser to confirm you know your Apple ID password.
- Check that you can receive verification codes on a trusted phone number or trusted device.
- Review your list of trusted devices and remove any old phones, tablets, or computers you no longer use.
If you ever lose access to your Apple ID, having verified contact methods and clean device lists makes account recovery faster and safer.
Back Up Your iPhone and Review Other Security Settings
Before you change any core security features, you should make a fresh backup. That way, you can restore your data even if your phone is lost or you need to reset it:
- For iCloud backup, go to Settings > [your name] > iCloud > iCloud Backup, then tap Back Up Now.
- For a computer backup, connect your iPhone to a Mac and use Finder, or to a Windows PC and use iTunes.
While you are in Settings, also check that:
- Your passcode is strong and not easy to guess.
- Find My iPhone is turned on.
- Two‑factor authentication is enabled on your Apple ID.
With your software updated, your accounts verified, and your data backed up, you are ready to walk through the steps to turn off Stolen Device Protection.
Step‑by‑Step: How to Turn Off Stolen Device Protection on iPhone
Now we come to the core of your question: how do I turn off Stolen Device Protection on iPhone in a safe and controlled way? Follow the steps below carefully, and read each on‑screen message before you confirm changes.
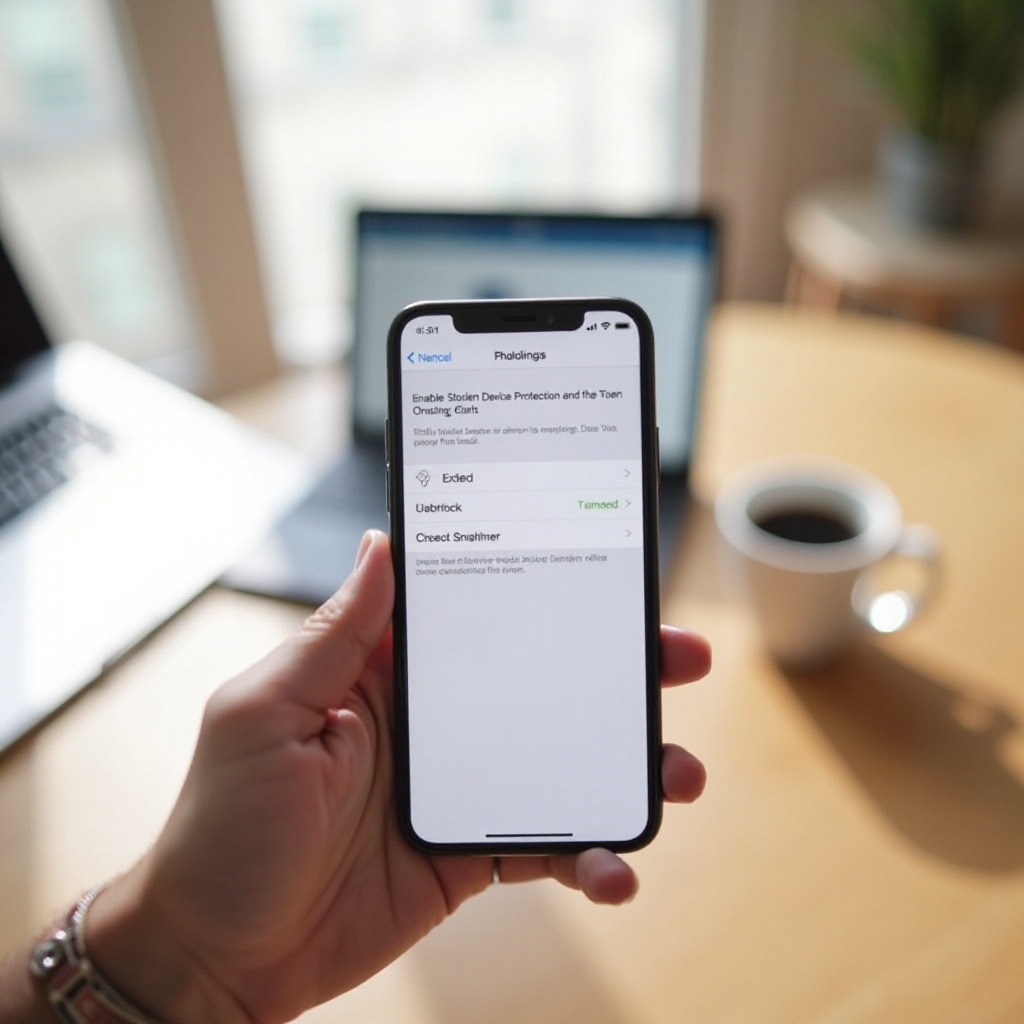
Open Settings and Navigate to Stolen Device Protection
Start from your Home screen:
- Tap the Settings app.
- Scroll down and tap Face ID & Passcode or Touch ID & Passcode, depending on your device.
- Enter your device passcode when prompted.
- Scroll until you see the Stolen Device Protection section.
You should see whether the feature is currently turned on. If you do not see this section, go back to the preparation steps and confirm your iOS version and region.
Authenticate with Face ID, Touch ID, or Your Passcode
Because you are about to modify a key security feature, iOS will ask you to prove you are the owner:
- Tap the Stolen Device Protection option or toggle.
- When prompted, authenticate using Face ID or Touch ID.
- If biometrics fail or are not available, enter your device passcode again.
These checks help prevent someone who only knows your passcode from making deep security changes without your knowledge.
Review Apple's Warning Screen and Confirm Your Choice
After you authenticate, Apple will show a warning screen that explains what happens when you disable Stolen Device Protection. This message usually reminds you that:
- Certain high‑risk actions will no longer require extra biometric checks.
- Thieves who know your passcode may be able to change critical settings more quickly.
Read the warning carefully. If you still want to continue:
- Tap Turn Off or the equivalent confirmation button.
- Confirm again if a second prompt appears.
Pause for a moment and think about your own risk level. If you feel uneasy, you can cancel and leave the feature on without changing anything.
Verify the Feature Is Turned Off and Test Key Actions
Once you confirm your choice, you should verify that the change is active:
- Return to the Stolen Device Protection section in Face ID & Passcode or Touch ID & Passcode.
- Check that the toggle or status now shows Off.
To test how your iPhone behaves:
- Open Settings and navigate toward a sensitive action, such as viewing options to change your Apple ID password or Find My settings.
- Notice whether you still see additional Stolen Device Protection prompts or security delay messages.
If those extra prompts are gone, the feature is disabled. However, sometimes you might not be able to turn it off in the first place or the setting might appear grayed out. In those cases, you will need some troubleshooting steps.

Troubleshooting: If You Can't Turn Off Stolen Device Protection
Not every iPhone will behave the same way. You might find that Stolen Device Protection is missing, cannot be changed, or refuses to accept your verification. Instead of forcing it, walk through some basic troubleshooting to understand what is going on.
Stolen Device Protection Setting Missing or Grayed Out
If you cannot see or adjust the Stolen Device Protection setting:
- Update iOS: Go to Settings > General > Software Update and install any available updates.
- Restart your iPhone: A simple restart can refresh system settings and clear minor glitches.
- Check for management profiles: If your iPhone is issued by your employer or school, it may use a Mobile Device Management (MDM) profile that locks certain security settings.
If Stolen Device Protection is not available in your region or on your device, or if an organization manages your phone, you may not have the option to turn it off at all.
Problems with Face ID, Touch ID, or Apple ID Verification
Sometimes you will see the option but cannot pass the required identity checks. To resolve this:
- Re‑set up Face ID or Touch ID under Settings > Face ID & Passcode or Touch ID & Passcode.
- Make sure your face or finger is clean, and you are in a well‑lit environment.
- Try using your device passcode instead of only relying on biometrics.
- Confirm you know your Apple ID password by signing in to appleid.apple.com in a browser.
If you still cannot verify your identity after careful attempts, do not keep guessing or repeatedly entering wrong details. That may trigger security locks that make access even harder.
When You Need to Contact Apple Support
You should contact Apple Support if:
- The Stolen Device Protection setting behaves inconsistently or disappears after previously appearing.
- You cannot verify your Apple ID or pass any security checks, even after using Apple's account recovery tools.
- You suspect someone else may have tampered with your device or Apple ID.
Apple can review your account status, confirm whether there is a security hold, and guide you through safe recovery steps. When you understand the limits and possible issues around disabling the feature, it is worth asking if you really need to switch it off or if you can simply adjust how you use your iPhone instead.
Safer Alternatives to Turning Off Stolen Device Protection Completely
If Stolen Device Protection mainly feels annoying or slow rather than truly blocking your work, you may not need to disable it at all. Small changes to your passcode, lock screen, and everyday habits can reduce friction while keeping this important protection active.
Adjust Your Passcode and Lock Screen Privacy
A strong passcode and a cleaner lock screen can make your iPhone both safer and easier to use:
- Switch from a short numeric passcode to a longer numeric or alphanumeric code.
- Hide sensitive content on the lock screen by limiting notification previews.
- Turn off lock screen access to features such as Control Center, Wallet, or certain widgets if you do not need them when the phone is locked.
These simple tweaks cut down how much information someone can grab just by glancing at your screen or swiping while your phone is locked.
Use Trusted Locations and Safer Unlock Habits
You can also reduce the chance of thieves learning your passcode by changing how and where you unlock your iPhone:
- Shield your screen with your hand or body when you enter your passcode in public.
- Use Face ID or Touch ID instead of typing your passcode whenever possible.
- Avoid unlocking your phone in crowded, high‑risk places unless you really need to.
The fewer times you type your passcode where others can see it, the less likely thieves are to memorize it and use it later.
Combine Stolen Device Protection with Other iPhone Security Tools
Stolen Device Protection works best as part of a broader security setup. Make sure you also:
- Turn on Find My iPhone so you can locate, lock, or erase your device if it is lost or stolen.
- Keep two‑factor authentication enabled on your Apple ID and use strong, unique passwords for key accounts.
- Use Apple's Safety Check (where available) to review which apps and people have access to your location, data, and account.
Together, these tools create multiple layers of defense. Rather than removing one of those layers, like Stolen Device Protection, it often makes more sense to fine‑tune how you work within them.
How to Re‑Enable Stolen Device Protection After Turning It Off
If you decide the risks of leaving Stolen Device Protection off are too high, you can turn it back on just as easily as you turned it off. Restoring the feature brings back the extra checks and delays that protect you if your passcode falls into the wrong hands.
Turning Stolen Device Protection Back On in Settings
To re‑enable Stolen Device Protection on your iPhone:
- Open the Settings app.
- Tap Face ID & Passcode or Touch ID & Passcode.
- Enter your device passcode.
- Scroll to Stolen Device Protection.
- Toggle the feature On or follow the on‑screen prompt to enable it.
- Authenticate with Face ID, Touch ID, or your Apple ID if the system asks you.
After you complete these steps, your iPhone will enforce the Stolen Device Protection rules again for supported actions.
Confirming It's Active with a Simple Security Test
To make sure Stolen Device Protection is really active:
- Go into Settings and start to access a sensitive option, such as Apple ID password settings or Find My adjustments.
- Check that the phone asks for extra confirmation or shows a security delay if you are in an unusual location.
If you see those prompts, you know Stolen Device Protection is back in place and helping protect your device and Apple ID.
Conclusion
Stolen Device Protection is more than just another toggle inside Settings. It is Apple's answer to real‑world iPhone theft tactics that rely on stolen passcodes and fast account changes. Turning it off can save a little time, but it also removes an important barrier between a thief and your Apple ID, Find My, and personal data.
You now understand what Stolen Device Protection does, what you risk by disabling it, and how to turn the feature off step by step if you still choose to do so. You have also seen how to troubleshoot common issues, use safer alternatives, and switch the feature back on when needed. Use this knowledge to decide whether you should leave Stolen Device Protection enabled, adjust your habits, or temporarily turn it off with a clear plan to re‑enable it later. Protecting your iPhone is ultimately about choices, and now you have the information to make the right one for you.
Frequently Asked Questions
Do I really need Stolen Device Protection if I already use Face ID and a strong passcode?
Yes. Face ID and a strong passcode protect your phone from casual access. Stolen Device Protection adds extra checks and delays if someone steals your phone and already knows your passcode. It makes high-risk actions, like changing your Apple ID password or disabling Find My, much harder for a thief to perform quickly.
Does turning off Stolen Device Protection affect Find My iPhone or Apple Pay?
Turning off Stolen Device Protection does not automatically disable Find My iPhone or Apple Pay. Those features still work. However, if a thief has your passcode, it becomes easier for them to turn off Find My or change key security settings because the extra layer of checks that Stolen Device Protection provides is no longer there.
Can I temporarily turn off Stolen Device Protection and turn it back on later?
Yes. You can turn Stolen Device Protection off for a specific reason, such as troubleshooting or a short-term need, and then turn it back on in Settings when you are done. While it is off, be extra careful about where you unlock your phone and who might see your passcode, and re-enable the feature as soon as it is practical.