Introduction
The screen recording tool on iPhone is one of the most useful built-in features for showing what happens on your screen. You can record app tutorials, save gameplay highlights, capture bugs to show support, or walk someone through a problem step by step. But many people open Control Center and cannot see the screen record icon at all. That is because you must add it manually before you can use it.
This guide explains exactly how to add the screen record button on iPhone, how to start and stop recordings, and how to fix common issues that might stop it from working. You will also learn practical tips to get cleaner recordings, plus important notes about privacy and legal rules in 2024.
We will start with a quick look at what the screen record button actually does and why it matters, then move on to compatibility checks and the exact steps inside Settings to enable it.
What the Screen Record Button Does on iPhone
The screen record button in Control Center tells your iPhone to capture everything that appears on your display as a video clip. Once you enable it, you can:
- Record the full screen, including gestures and swipes.
- Capture app interfaces, menus, and settings for tutorials.
- Turn on the microphone to add your own voice commentary.
- Show someone a bug or issue by recording it as it happens.
The recording saves as a video file inside the Photos app. From there, you can trim it, edit it, and share it like any other video.
This tool does not work like a camera that points at the screen from outside. It records the digital signal from the system itself. That means the recording is usually sharp and clear, with the same resolution as your display. Before you can enjoy this feature, you must confirm that your device and software support it so that you do not waste time troubleshooting a phone that simply cannot use the feature.
Check Your iPhone and iOS Are Compatible
Before you try to add the screen record button, make sure your iPhone and iOS version can use it. Most recent models do, but it is worth checking first.
- Confirm your iPhone model
- Go to Settings > General > About.
- Check Model Name and Software Version.
-
Screen recording works on all modern iPhones that can run current iOS versions, such as iPhone 11, 12, 13, 14, 15 series, SE (2nd gen and later), and similar devices.
-
Make sure you are on a recent iOS version
- In Settings > General > Software Update, see whether an update is available.
- If you see a new iOS update such as iOS 17 or later, consider installing it for best compatibility and stability.
-
Keep your phone charged and connected to Wi‑Fi before updating.
-
Check any restrictions from work or school
- If your iPhone comes from your employer or school, it may use a management profile that restricts some features.
- Go to Settings > General > VPN & Device Management.
- If there is a management profile, an admin may control screen recording settings.
Once you know your iPhone is compatible and not blocked by a profile, you are ready to add the button to Control Center. The next section walks through the exact steps so the screen record control shows up every time you swipe.
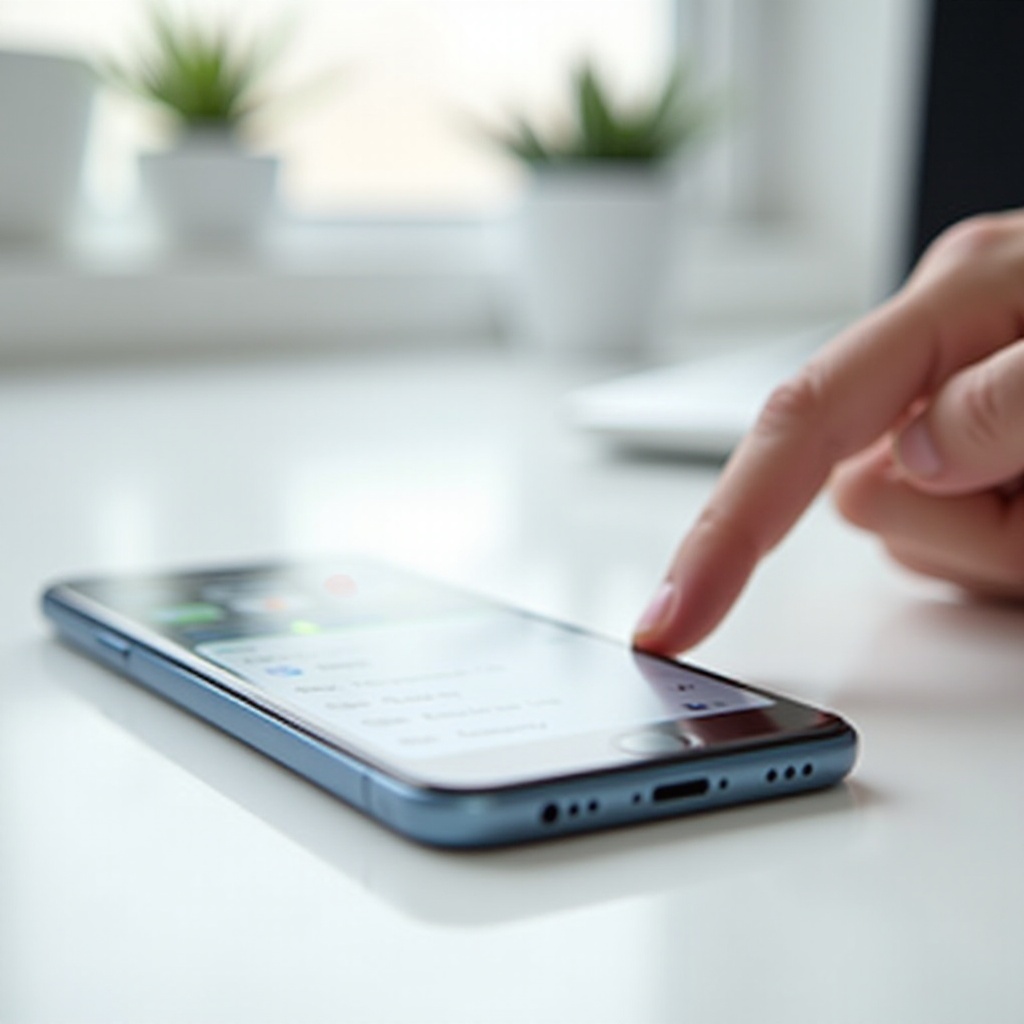
How to Add the Screen Record Button to Control Center (Main Steps)
To use screen recording, you must first add its icon to Control Center. Control Center is the quick panel you open with a swipe to access shortcuts like Wi‑Fi, Bluetooth, and brightness. Here is how to put the screen record button there.
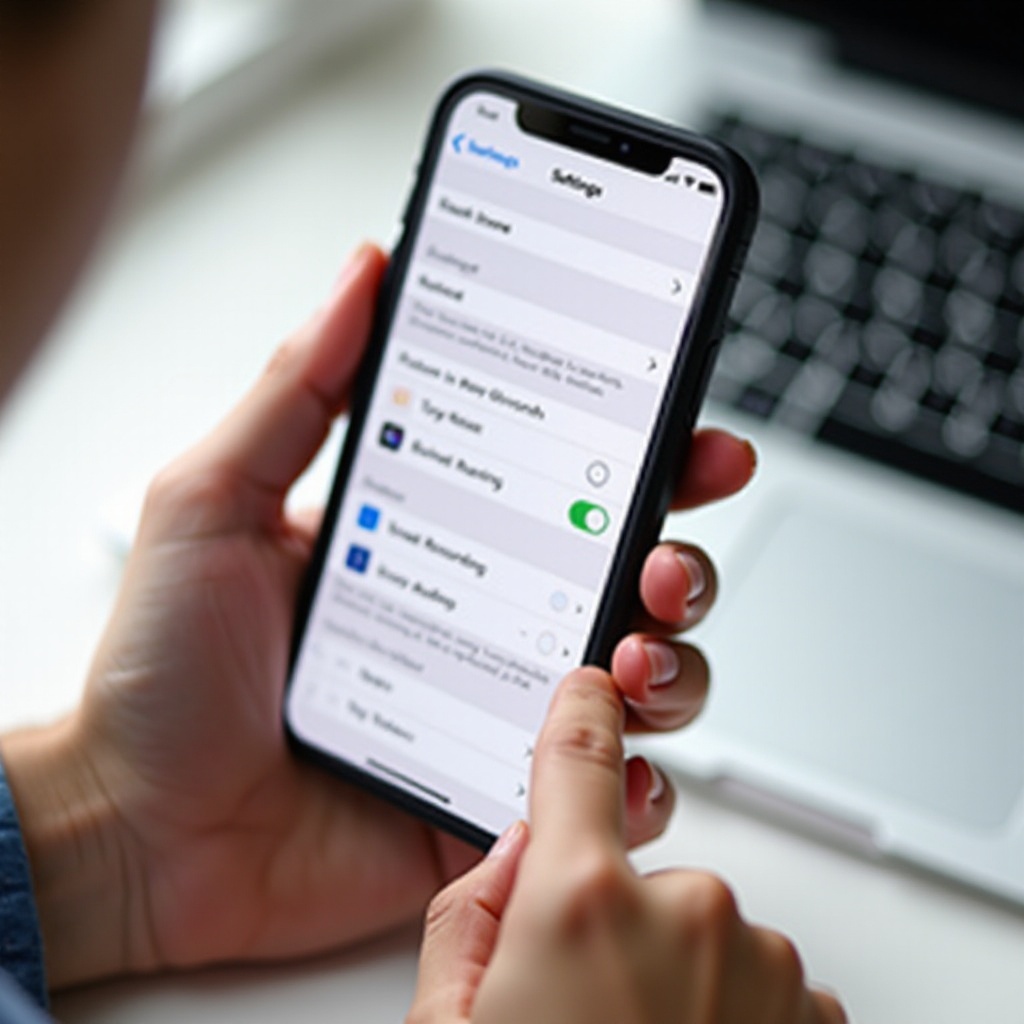
Open the Settings App on Your iPhone
- Unlock your iPhone.
- Tap the Settings app (the gray gear icon) on your Home screen or in your App Library.
- You will use Settings to change Control Center and add new controls such as Screen Recording.
Go to Control Center Settings
- In Settings, scroll down until you see Control Center.
- Tap Control Center to open its options.
- On this screen, you manage which shortcuts appear when you open Control Center.
Find and Add the Screen Recording Control
- In Control Center settings, you will see two sections:
- Included Controls (what you already have in Control Center).
- More Controls (options you can add).
- Scroll under More Controls until you find Screen Recording.
- Tap the green + button next to Screen Recording.
- After you tap the plus icon, Screen Recording moves up into Included Controls.
- This means the screen record button is now active in Control Center.
Reorder Controls to Make Screen Record Easy to Reach
If you plan to use screen recording often, keep it near the top so you can find it quickly.
- In the Included Controls list, find Screen Recording.
- Press and hold the ≡ icon next to it.
- Drag it higher or lower to place it where you want.
- Release when you are happy with the order.
You have now added the screen record button to Control Center and placed it exactly where you want. Next, you will learn how to open Control Center on your specific iPhone model and start your first screen recording in just a few taps.
How to Start a Screen Recording After Adding the Button
With the button added, you can start recording your iPhone screen at any time. The way you open Control Center depends on whether your iPhone has Face ID or a Home button, but once you are inside, the process is the same.
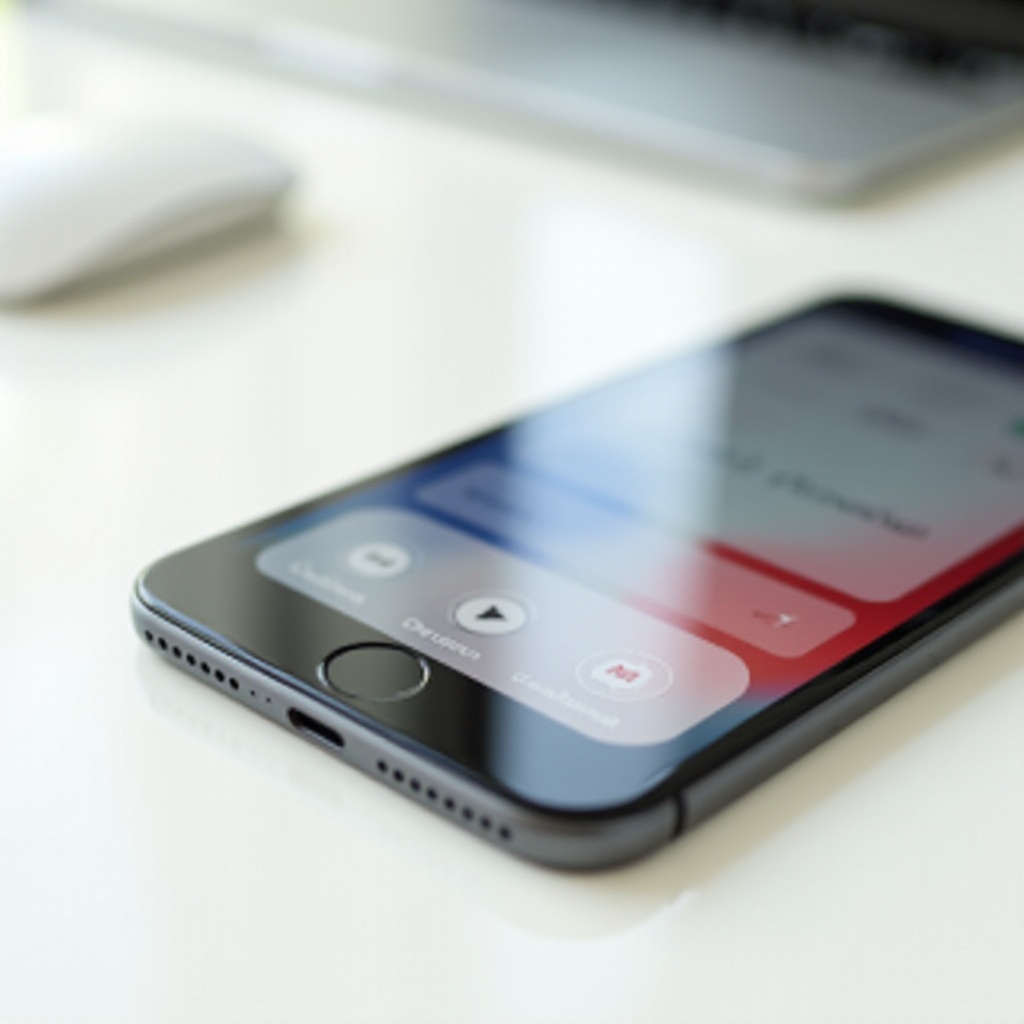
Open Control Center on Face ID iPhones
On iPhones with Face ID (iPhone X and later, including most newer models):
- Place your finger at the top-right corner of the screen, near the battery icon.
- Swipe downward.
- Control Center will slide down, showing quick toggles and sliders.
You should see the Screen Recording button: a solid dot inside a larger circle.
Open Control Center on Home Button iPhones
On iPhones with a physical Home button (for example, some SE models):
- Place your finger at the bottom edge of the screen.
- Swipe upward.
- Control Center appears, and you can look for the Screen Recording icon there.
Start a Basic Screen Recording with One Tap
Once Control Center is open:
- Tap the Screen Recording icon once.
- A 3‑second countdown appears inside the icon.
- After the countdown, your iPhone starts recording the screen.
- A red indicator (either a red bar, red bubble, or red icon in the Dynamic Island, depending on your iPhone) shows the recording is active.
During recording, everything on your screen gets captured, including notifications, incoming calls, and app activity. If you want to speak over the recording or explain what viewers see, you should enable the microphone first.
Turn On Microphone Audio Before Recording
If you want to add your voice:
- Open Control Center.
- Press and hold (long‑press) the Screen Recording icon.
- A panel appears with a Microphone button at the bottom.
- Tap the Microphone icon to switch it to On (it turns red).
- Tap Start Recording.
Now your iPhone records both the screen and any sound picked up by the microphone. When you have captured what you need, it is time to stop the recording and find the video in the Photos app so you can review and edit it.
How to Stop the Recording and Find Your Video
You can stop screen recording from the status area or from Control Center. The method varies slightly across devices, but both are quick and easy.
Stop the Recording from the Status Bar or Dynamic Island
- Look at the top of the screen while recording:
- Some models show a red pill-shaped indicator or red bubble.
- Newer devices with Dynamic Island show a red icon in that area.
- Tap the red indicator once.
- A prompt appears asking if you want to stop recording.
- Tap Stop.
The recording ends immediately, and a notification appears to confirm that your video saved to Photos.
Stop the Recording from Control Center
- Open Control Center again (swipe down from the top right or up from the bottom).
- The Screen Recording icon will be red while recording.
- Tap the red Screen Recording icon.
- The recording stops, and a message states that the screen recording has been saved to Photos.
Locate Your Screen Recording in the Photos App
After you stop recording:
- Open the Photos app.
- Tap the Albums tab at the bottom.
- Scroll down to the Media Types section and select Screen Recordings.
- Your latest recording appears at the top of this album.
You can also find it in Recents. Now that you know where recordings live and how to stop them cleanly, the next step is to make sure your clips look polished and avoid distractions like random notifications and orientation changes.
Tips to Get Better Screen Recordings on iPhone
Raw screen recordings often capture more than you want, such as pop‑up notifications, status bar clutter, or random app switches. A bit of preparation improves quality and keeps private data off your video.
Use Focus or Do Not Disturb to Hide Notifications
Notifications can reveal private messages, email subjects, or other personal information. To avoid this:
- Open Control Center.
- Tap Focus or Do Not Disturb.
- Choose a Focus mode (for example, Do Not Disturb or a custom work or recording mode).
This stops most notifications from appearing while you record, giving you a cleaner, distraction‑free result.
Lock Orientation and Adjust Brightness
Changing orientation mid-record can make videos look messy and harder to watch.
- In Control Center, tap the rotation lock icon to keep the screen in portrait or landscape.
- Use the brightness slider to set a comfortable level that is not too dark or too bright.
Consistent orientation and brightness make your recording easier to follow and nicer to share.
Make Sure You Have Enough Storage Space
Long screen recordings can create large files. If your storage is nearly full, your iPhone might stop recording early or fail to save the file.
- Go to Settings > General > iPhone Storage.
- Check how much free space you have.
- Delete old videos, large files, or apps you no longer use if needed.
Keeping some free space helps prevent errors and makes saving your recordings more reliable.
Prepare Your Screen Before You Start Recording
Before you hit record:
- Close any apps you do not need.
- Open the app or screen you plan to record.
- Sign out of or hide screens that show sensitive data.
- Decide the steps you will show so you do not wander through menus.
This simple planning saves time and keeps the final video short, clear, and useful. Once you have a good recording, you can polish it further with basic edits so it is ready to send or upload.
Editing and Sharing Your Screen Recordings
A quick trim and a few simple edits can turn a rough screen capture into a neat tutorial or clean clip to share with others. You do not need advanced skills to make your recordings look better.
Trim the Beginning and End of Your Recording
Often, the first and last seconds of a recording show you opening Control Center or stopping the video. To remove these:
- Open Photos and select your screen recording.
- Tap Edit in the top-right corner.
- Use the sliders at the bottom of the video timeline to trim the start and end.
- Tap Done, then choose Save Video or Save Video as New Clip.
This makes your recording look more professional and focused on the main action.
Use Markup and Simple Editing Tools
For quick callouts or highlights:
- With the recording open, tap Edit.
- Tap the Markup icon (pen tip) if available.
- Draw arrows, circle important buttons, or add notes on frames.
You can also adjust exposure, contrast, or crop the frame to hide the status bar or other elements that do not help the viewer.
Share Your Screen Recording via Messages, Mail, or Social Apps
When you are ready to share:
- In Photos, open the screen recording.
- Tap the Share icon (square with an up arrow).
- Choose a method:
- Messages for quick clips to friends or family.
- Mail for longer explanations or work-related videos.
- Social apps like WhatsApp, Telegram, or others.
Your iPhone will compress and attach the clip. For very long videos, consider sharing via a cloud link from iCloud Drive, Google Drive, or another service to avoid size limits.
Export to Video Editors for Advanced Edits
If you need more control over your video:
- In the Share menu, choose Save to Files or send the video directly to an editor such as iMovie, CapCut, or LumaFusion.
- Open your chosen app and import the screen recording.
- Add transitions, voice-over, music, or text overlays as needed.
Once you have a polished recording ready to go, you might still run into issues from time to time. The next section covers common problems and fixes so you know what to do when the button does not behave as expected.
Troubleshooting: Screen Record Button Not Showing or Not Working
Sometimes the screen record button does not appear, stays grey, or recordings fail to save. Most issues have simple fixes in Settings, especially around Control Center, Screen Time, and storage.
Screen Recording Option Missing in Control Center
If you cannot find Screen Recording under More Controls:
- Double-check that your iPhone runs a recent iOS version in Settings > General > Software Update.
- Restart your iPhone and check Control Center settings again.
- If it still does not show, a management profile might disable it. Go to Settings > General > VPN & Device Management and look for any profile that may restrict features. Contact your IT admin if needed.
Screen Recording Greyed Out or Restricted by Screen Time
When the icon is there but grey and will not start:
- Go to Settings > Screen Time.
- Tap Content & Privacy Restrictions.
- Tap Content Restrictions and look for any setting related to screen recording or game capture.
- Make sure screen recording is set to Allow.
If you use a child's device, a parent or guardian may need to change the Screen Time settings from their Family Sharing account.
'Screen Recording Failed to Save' or Not Saving to Photos
If you see errors or cannot find the recording:
- Check iPhone Storage in Settings > General. Free up space by deleting old videos or apps.
- Make sure Photos has permission and is not restricted in Screen Time or by a management profile.
- Restart your iPhone and test with a short 5‑second recording.
If clearing space and restarting solve the issue, try to keep some free storage available so large recordings do not fail again.
No Sound or Audio Problems in Screen Recordings
If there is no audio in the video:
- Confirm you turned the Microphone on before starting the recording (long‑press the icon in Control Center and toggle the mic).
- Turn up the volume using the side buttons while recording or during playback.
- Check that no Bluetooth headphones or speakers are connected if you want sound to come from the phone itself.
Some apps may mute certain audio types for rights reasons, so remember that the absence of sound could be an app limitation, not a bug.
Apps or Content That Block Screen Recording
Certain apps and streaming services block screen recording to protect copyrighted content or sensitive data. If the screen turns black or the app refuses to show content in recordings, that behavior is intentional. You can:
- Try recording only your menu navigation, not the protected content.
- Use text or voice explanations instead of a direct video capture of restricted screens.
- Check the app's help section for its policy on recording.
Once you understand these limits, you can use screen recording safely within what your iPhone and apps allow. The final step is to stay aware of privacy and legal concerns so your recordings do not expose data you never meant to share.
Privacy, Security, and Legal Considerations in 2024
Screen recording can capture sensitive information about you and other people. You should know what your phone can record and how to protect yourself and others while using this feature.
What Information the iPhone Screen Recorder Can Capture
Screen recording can include:
- Messages and notifications that pop up.
- Contact names, email previews, and private app content.
- Account numbers or security codes shown on screen.
- Photos or documents visible in the background.
Review what is visible before recording, and use Focus modes to block pop‑ups that reveal private details. When you edit, consider trimming or cropping sections that show sensitive information.
Apps and Content That May Prevent Screen Recording
Some banking apps, streaming platforms, and secure communications tools limit or block screen recording. This protects:
- Financial information and authentication screens.
- DRM‑protected movies and shows.
- Some secure chats and internal work apps.
Respect these limits. Trying to bypass them can violate terms of service, break company policy, or even break local laws in some regions.
Consent and Legal Rules When Recording Others
If your screen captures other people's names, faces, or conversations (for example, in a video call or group chat):
- Ask for consent before recording and sharing.
- Follow local laws about recording communications and calls.
- Avoid posting recordings with personal data without clear permission.
Using screen recording responsibly keeps your own data secure and respects the privacy of others. With that in mind, let's close with a quick recap of what you learned and how to put it into practice.
Conclusion
Adding the screen record button on iPhone is a simple but powerful change. By visiting Settings, opening Control Center, and enabling the Screen Recording control, you unlock the ability to capture anything that happens on your screen as a clear, shareable video.
You have learned how to add the button, start and stop recordings, turn on microphone audio, and find your clips in the Photos app. You have also seen how to prepare your screen, use Focus modes, and edit your videos so they look clean and professional. Finally, you explored how to fix common issues and why privacy, restrictions, and consent matter in 2024.
Follow these steps, test a few short clips, and soon you will have screen recordings that are ready to share with friends, customers, or colleagues whenever you need them. With a little practice, the screen record button will become one of the most useful tools in your iPhone toolkit.
Frequently Asked Questions
Why can’t I see the screen record button in my iPhone Control Center?
Most of the time, the button does not appear because it has not been added yet. Go to Settings > Control Center, scroll to More Controls, and tap the + next to Screen Recording. If it still does not show, check for iOS updates and any device management profile under Settings > General > VPN & Device Management that might disable the feature. A work or school profile can hide the control.
Does screen recording capture my phone calls or FaceTime video?
Standard iPhone screen recording does not capture regular phone call audio. FaceTime video and audio may appear in some cases, but app rules and local laws vary, and other people on the call may not want to be recorded. Always ask for permission before recording calls or video chats, and check the current legal rules and app policies in your region to avoid privacy issues.
How long can I screen record on my iPhone before it stops?
There is no strict time limit set by iOS itself. In practice, your recording length depends on available storage, battery level, and how demanding the apps are that you are recording. As the video grows, the file size increases. If your storage fills up, recording may stop or fail to save. For long sessions, keep your iPhone charged, close unused apps, and check free space in Settings > General > iPhone Storage before you start recording.