Introduction
Screen protectors play a crucial role in keeping your iPhone’s display in pristine condition by safeguarding it from scratches and cracks. Over time, these protectors can wear out, necessitating a replacement. Replacing your screen protector at the right time can enhance your phone’s appearance and functionality. This comprehensive guide provides you with all the steps and tips needed to replace your screen protector efficiently and effectively, ensuring flawless results.
Preparing for Replacement
Before embarking on the replacement journey, it’s vital to gather the right tools and set up an ideal workspace. Ensuring that everything is in place will streamline the process, helping you achieve the best outcome.
-
Gather Necessary Tools and Materials: To start, you’ll need a new screen protector, a microfiber cloth, adhesive tape, and a reputable screen cleaning solution.
-
Setting Up a Clean Work Environment: Locate a dust-free area with ample lighting. Clean the surface of dust and debris to prevent them from getting between your screen and its new protector.
With these preparations done, you are ready to remove the old screen protector. Being careful during this step will ensure no damage to your iPhone screen or unwanted adhesive is left behind.
Removing the Old Screen Protector
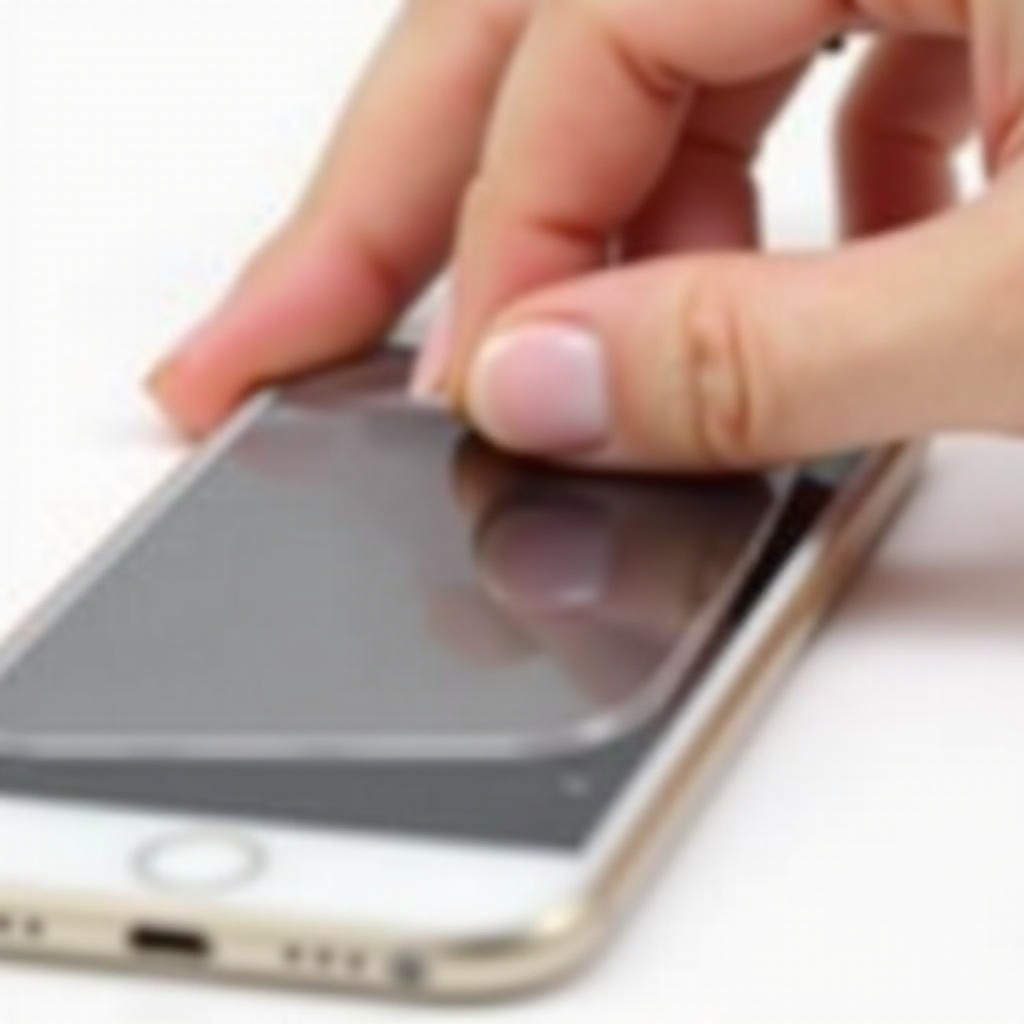
Carefully removing the old screen protector is a crucial step that sets the stage for a seamless new application.
-
Safe Removal Techniques: Begin by gently lifting a corner of the screen protector with a thin, flat tool or your fingernail. Peel back the protector slowly, keeping the angle low to prevent breakage.
-
Handling Residue and Adhesive: Check for any remaining sticky residue on the screen. Use a piece of adhesive tape to lift any remnants without causing harm to the screen.
With the old protector removed and the screen residue-free, it’s time to move on to cleaning the screen. A thoroughly cleaned screen is critical for effective adhesion of the new protector.
Cleaning Your iPhone Screen
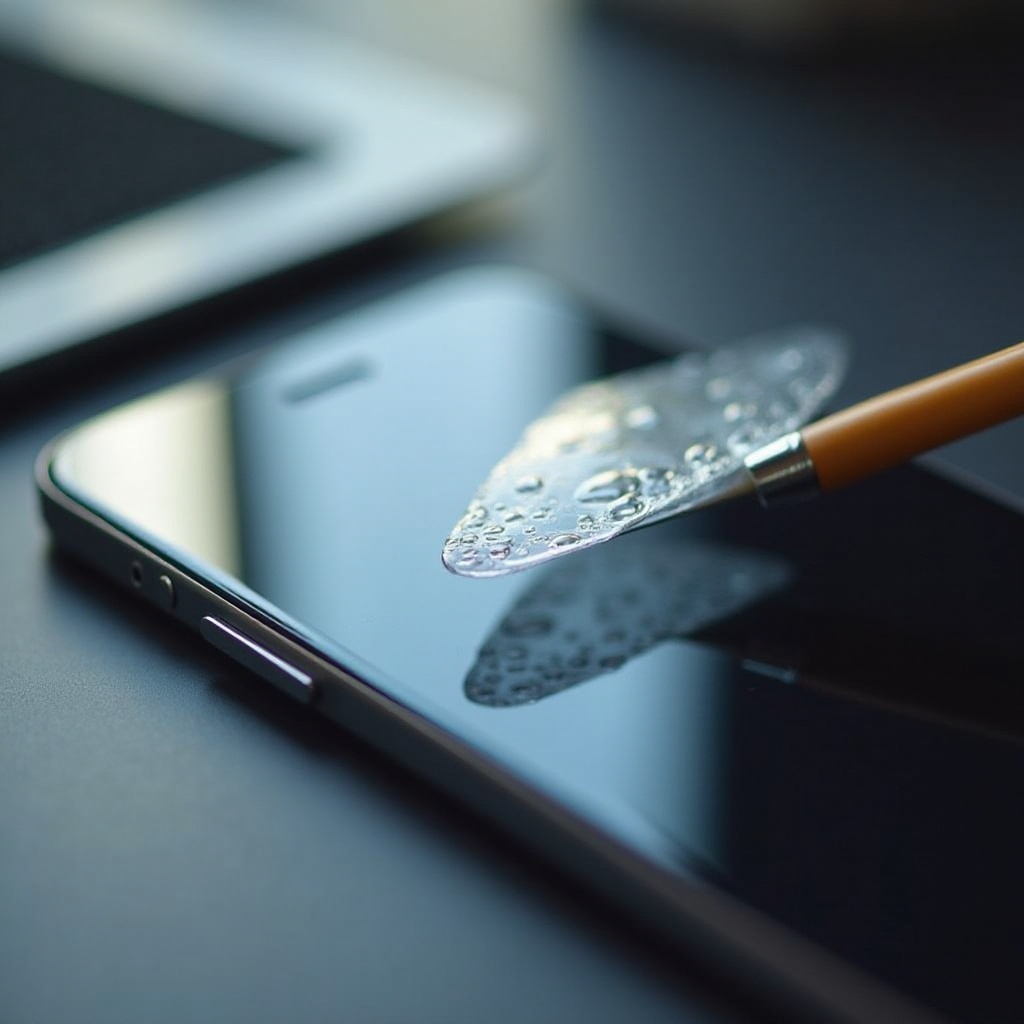
To ensure that the new screen protector adheres smoothly, cleaning the screen meticulously is essential.
-
Recommended Cleaning Solutions: Use a soft microfiber cloth along with a small amount of screen cleaning solution. Apply the solution to the cloth instead of spraying directly onto the screen to avoid moisture damage.
-
Steps for Ensuring a Spotless Screen: Gently wipe the screen with the cloth, making sure to cover the entire surface. Pay extra attention to corners where dust tends to gather. Repeat the process until the surface is clean and dry.
With a sparkling clean screen prepped, you’re ready to apply the new screen protector. This next step requires accuracy and patience to get a wrinkle and bubble-free finish.
Applying the New Screen Protector
Applying a new screen protector demands precision to ensure proper fit and optimal visual clarity.
-
Aligning the Protector Correctly: Start by peeling back a small section of the protective backing from the new screen protector. Line it up meticulously with your phone’s edges and camera cutouts.
-
Methods to Avoid Bubbles: Slowly remove the rest of the backing while using a credit card or a special smoothing tool to apply even pressure across the protector, reducing air bubbles.
-
Adjusting for Perfect Fit: If misalignment happens, gently lift the protector and readjust before it fully adheres to the screen. Doing this immediately helps avoid wrinkles and bubbles.
With the screen protector applied to your satisfaction, the final step involves solidifying its position and ensuring long-lasting protection.
Post-Application Tips
To maintain the new protector, follow some post-application care tips to ensure it stays in place and continues to protect your screen effectively.
-
Smoothing Out the Edges: Run a soft cloth or your finger along the edges of the screen protector to ensure it adheres securely to the screen, preventing it from lifting over time.
-
Ensuring Longevity of the Protector: Regularly clean your screen using a microfiber cloth, and avoid using abrasive materials or solutions that could damage the protector.
Issues might still arise after application, but the next section will arm you with the right solutions to common problems encountered.
Troubleshooting Common Issues
Even with careful application, some common issues might occur, and knowing how to tackle them can save both time and frustration:
-
Dealing With Air Bubbles: Address air bubbles by gently pushing them towards the nearest edge using a flat card. For persistent bubbles, slightly lift the edge and smooth down carefully.
-
Correcting Misalignment: If the protector has been misaligned, gently peel it off and reposition it promptly before it fully sticks. Adjust slowly to avoid bending or tearing.
Understanding these troubleshooting techniques ensures that any problems during application can be quickly resolved, leaving your device looking sharp and well-protected.
Conclusion
Replacing your iPhone screen protector is a straightforward process when you follow a detailed, step-by-step guide. By preparing adequately, removing carefully, cleaning thoroughly, applying precisely, and maintaining consistently, you can ensure that your iPhone remains secure and stylish. Protect your investment and enjoy the clarity of a new screen protector that looks professional and provides enduring durability.
Frequently Asked Questions
How often should I replace my iPhone screen protector?
You should replace your screen protector every 6 to 12 months or when it shows significant damage or wear.
Can I reuse an old screen protector?
No, reusing an old screen protector is not recommended because the adhesive loses its effectiveness, compromising protection.
What materials should I avoid using on my screen?
Avoid using abrasive cloths, paper towels, or household cleaners, as they can damage the screen or the protector.